How To Backup and Restore Google Chrome Bookmarks and Profile
Google chrome is the one of the most popular browser in browsing world. When we browse in different sites we save our important web address as bookmarks.
Now Imagine that you’ve lost or accidently deleted your important bookmarks.
Also, we frequently Reinstall Windows on Computers. Then I’m telling you what you should do.
In this article I will tell you how can you backup and restore your google chrome profile and bookmarks before and after accidently deleted.
There are three ways to backup your google chrome profile and bookmarks.
Three ways to backup your google chrome profile and bookmarks.
First Way: : Sign In
Second Way: : Export & Import
Third Way: : Profile Folder
Now Read carefully about the various systems
First Way: : Sign In :
You can easily backup your bookmarks and profile by singing google account.
For this you must have a gmail Account. To setup sync, you may go to either of the following.
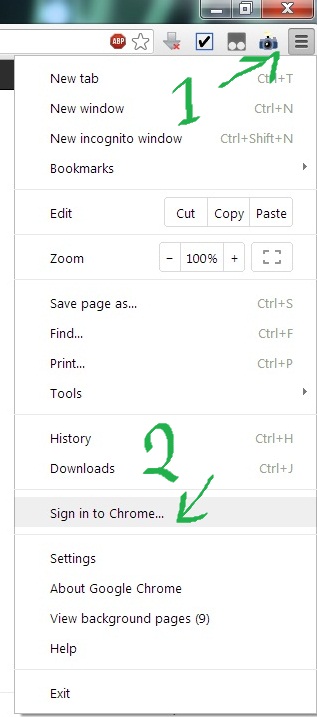
- Setting > Sing In to Chrome > Enter your Gmail ID and Password
- Setting > Personal Stuff > Sing In to Chrome > Enter your Gmail ID and Password
[1st one for newer version and 2nd one for older version]
Second Way: : Export & Import :
You can also backup and restore your bookmarks by exporting and importing a html file.
Later, you can import the HTML bookmark file into Chrome.
To backup go to
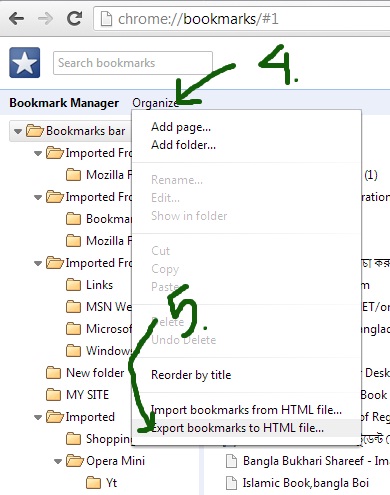
Setting > Bookmark Manager > Organize > Export bookmarks to html file and save the file showing a safe location on your computer.
Exporting bookmarks to html file
To restore your bokmarks go to Setting > Bookmark Manager>Organize>Import bookmarks from html file and open the file which you saved as html.
Third Way: : Profile Folder :
This is the most interesting way to backup and restore your google chrome bookmarks and profile settings.
To do this you do not need to do anything to back up. Actually bookmarks are automatically saved by the browsers in their installation folder.
To make a backup, you have to find the backup file in your Profile Folder.
You can find the backup file :
[For Xp User] C:\Documents and Settings\\Local Settings\Application Data\Google\Chrome\User Data\Default
[For Windows Vista Users]
C:\Users\Administrator\Local Settings\Application Data\Google\Chrome\User Data\Default
[For Windows 7 Users]
C:\Users\Administrator\AppData\Local\Google\Chrome\User Data\Default
[For Windows 8 and 8.1 Users]
C:\Users\USER\AppData\Local\Google\Chrome\User Data\Default
Copy all the files [or only ” bookmarks ” & “Preference”] to a safe location on your Computer for further uses. Thus you made backup.
Now when you need to restore the Bookmarks & Settings, Just copy the two files into Profile Folder.
- Replace by clicking “yes”. Now open your web browser you will find all your bookmarks in right place.
So No Problem If you Lose Your Bookmarks Before Backup.